 |
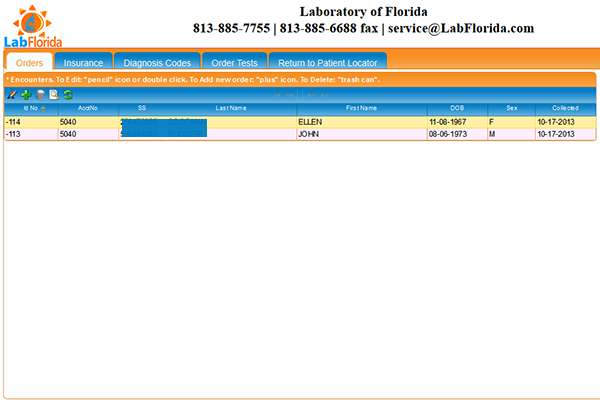
If you chose to place a new order for an existing patient in the "Search Results" tab, you will see patient records here.
To start a new order: click on the "plus" icon and start your order from scratch. Typically you will need to do this for your new patients. You will have to go through all tabs to create the new patient record. IMPORTANT: it is critical that you enter full and complete data accurately and without typing errors. A small error in the data entry may cause all kinds of problems down the road. |
 |
This will be filled out automatically if you are ordering for an existing patient records. You will need to provide the insurance information for new patients. IMPORTANT: it is critical that you enter full and complete data accurately and without typing errors. |
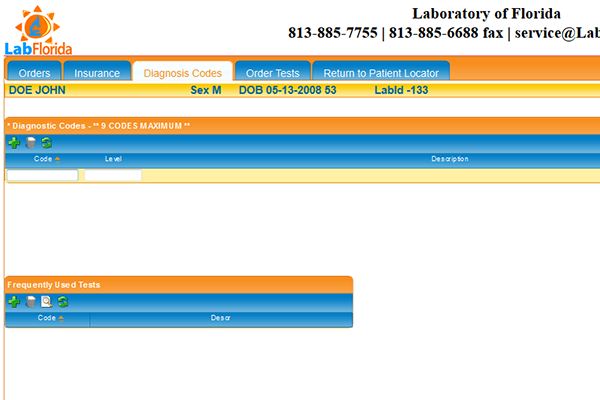 |
You will see ICD codes for previous orders if you are ordering for an existing patient. You will need to provide the diagnosis codes/descriptions for new patient orders. IMPORTANT: it is critical that you enter full and complete data accurately to avoid unnecessary calls and faxes to your office with requests to provide missing information. |
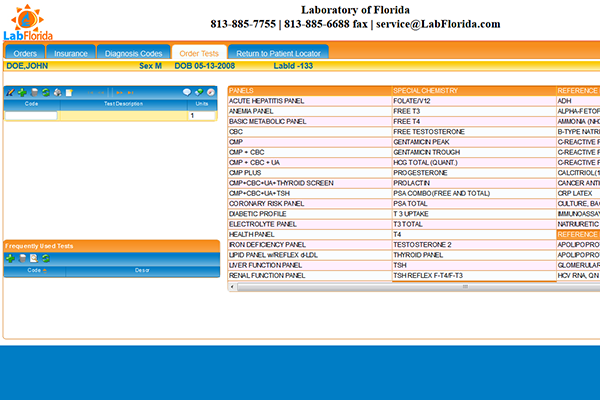 |
Previously ordered tests for existing patients will be suggested in the left column. You can choose to re-order them or delete them. To add new tests, use the right column with panels and test. Simply click on a test you want and it will be added to the order. |
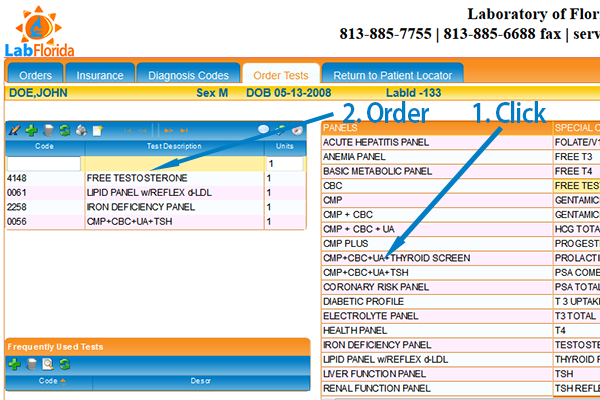 |
To order a panel or tests: locate the test you want to order and click on it. It will appear in the order window. |
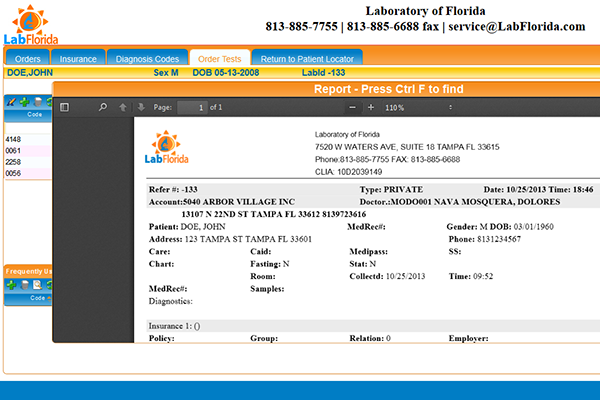 |
To verify and finalize your test order, click on the "printer" action icon. An electronic requisition ("e-Req") will be generated for you. Go over the order to check it. If everything is OK, just close the window - we have already received your order. You can go ahead and place a new order, check results or log out. If you need to change or add tests to the order, close the e-Req and click on the "Edit" action icon to continue. When done, click the "printer" action icon again to generate a new e-Req. Close the form when finished. That's it! |